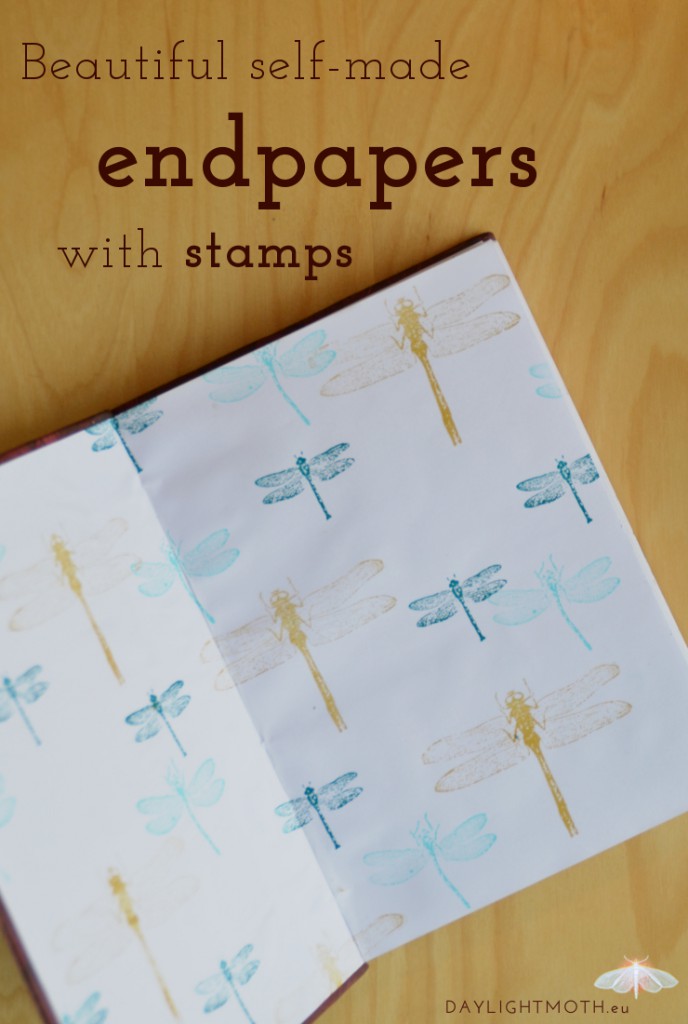
 When binding books I always place a decorative sheet of paper between my pages and my cover. When I started bookbinding, they were usually just plain sheets of coloured paper. Recently I discovered the beauty (and addictiveness) of stamps and decided to up my endpaper game by creating my own nice looking decorative endpapers. Of course you could also use this as your home-made very individual scrap book paper.
Three steps for prettily stamped papers
For this design I used three stamps of fireflies in different sizes. Mine came in a pack but I’m sure whatever motive you choose, you can find lots of different stamps in all shapes and sizes out there. The paper is very plain matte photo paper. I’ve bought that in a big bulk once. It’s a little sturdier than normal paper with a smooth surface. You can use all kinds of paper – coloured or white – as long as they’re a little sturdier than normal print-out paper, so preferably 100 g/m2 or more.
My stamp pads are a happy mix from various shopping trips and miraculously fit quite well together. I recommend three colours of either the same or similar tone in different levels of brightness. Or try using three completely different colours. Just makes sure those are all cool or all warm tones.
How to use colours and effects
1. Creating a base
I started with the biggest firefly in the lightest colour and then continuously went smaller with the design and darker with the colour. I didn’t want to overwhelm the whole pattern with the very big firefly, so that’s why it got the lightest colour and the scarcest use. The big motive is a good guideline for the whole design. It’s where you build your basic construction and what you’ll be working with in the end. All the smaller ones are just the extras on top. So, make sure, you’ve got an even but not too mathematical layout. And don’t overclutter. You still need room to breathe.
2. Play with it
Aligning all the stamps in the same direction makes for a calm and orderly look. But it might seem too severe in some arrangements. Just try to let a few of your stamps fall a little out of place. For my composition the slightly curved body of the middle firefly broke the geometrical pattern and added an interesting eye-catcher.
3. Add some texture
My first two colours were very similar in their lightness. To add depth to the picture I chose a colour that is several shades darker. This makes a rather bland composition interesting and vivid. I would just advise you not to choose black, as it might be too stark a contrast. (Then again, just go ahead and use black, I admit it, I just don’t like black)
Creating other effects wit stamps
If you’re reversing the colours – big dark fireflies and small light toned ones – this will create a dimensional effect. Even more so if your lighter colours have a bluish tinge to them. Warmer colours appear nearer; cold tones appear farther away. But be careful not to drown your arrangement in too many big, dark objects in the front.
Pro-tips for a scattered looking arrangement
- Let the motives overlaps. It’ll look instantly more natural and will loosen up your pattern.
- Let some half fireflies fly into and out of the paper
- The bigger the stamp, the less you should use it, especially if you’re going for a dimensional effect
As you can see, there’s really not that much to take into account. It’s an easy but effectual way to create a nice looking and unique paper. I use mine as an endpaper for my bookbinding projects but you could use it for whatever you like: cards, envelopes, book or notebook covers, covers for boxes, wrapping paper…
I really love my firefly ensemble and I’ve used it many times in different projects. So, just because I’m curious: What are your favourite stamp motives? Anything you could suggest to me? I would love to try something new.


