This easy peasy to make DIY necklace organizer was made mostly from leftover material and stuff I already owned, so it came quite cheap to me. And I like that the display invites me to wear my jewellery more.
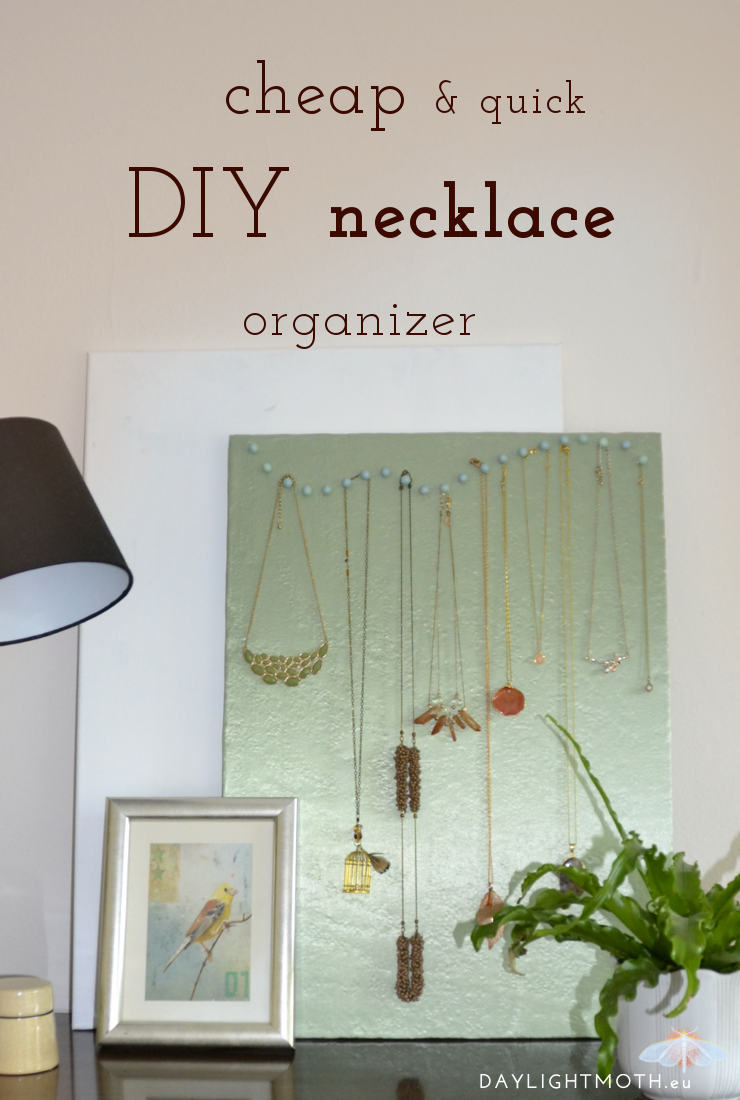
I’m one of those girls who own lots of jewellery in all shapes and colours and sizes – and consequently always having a hard time to store all my treasures. I found a nice way of storing all my earrings, rings, bracelets and pearl necklaces in drawers but my longer and thinner pendant necklaces would constantly get tangled in these. So there had to be another solution for them – cue the DIY idea.
What you need
- Polystyrene board (size depending on your longest necklace and how many you want to store)
- Fabric to wrap your board in
- Drawing pins
- Nail polish or other varnish
- Glue
- About half an hour of time on two days
How to make the DIY necklace organizer
What I did is – simply put – making the ingredients look pretty and then putting them together. At first, I wrapped the polystyrene board with fabric. I was using normal paper glue for the front of the board to not make the glue sip through the fabric. To fasten the fabric around the edges I used a stronger glue. My glue gun worked nicely with this.
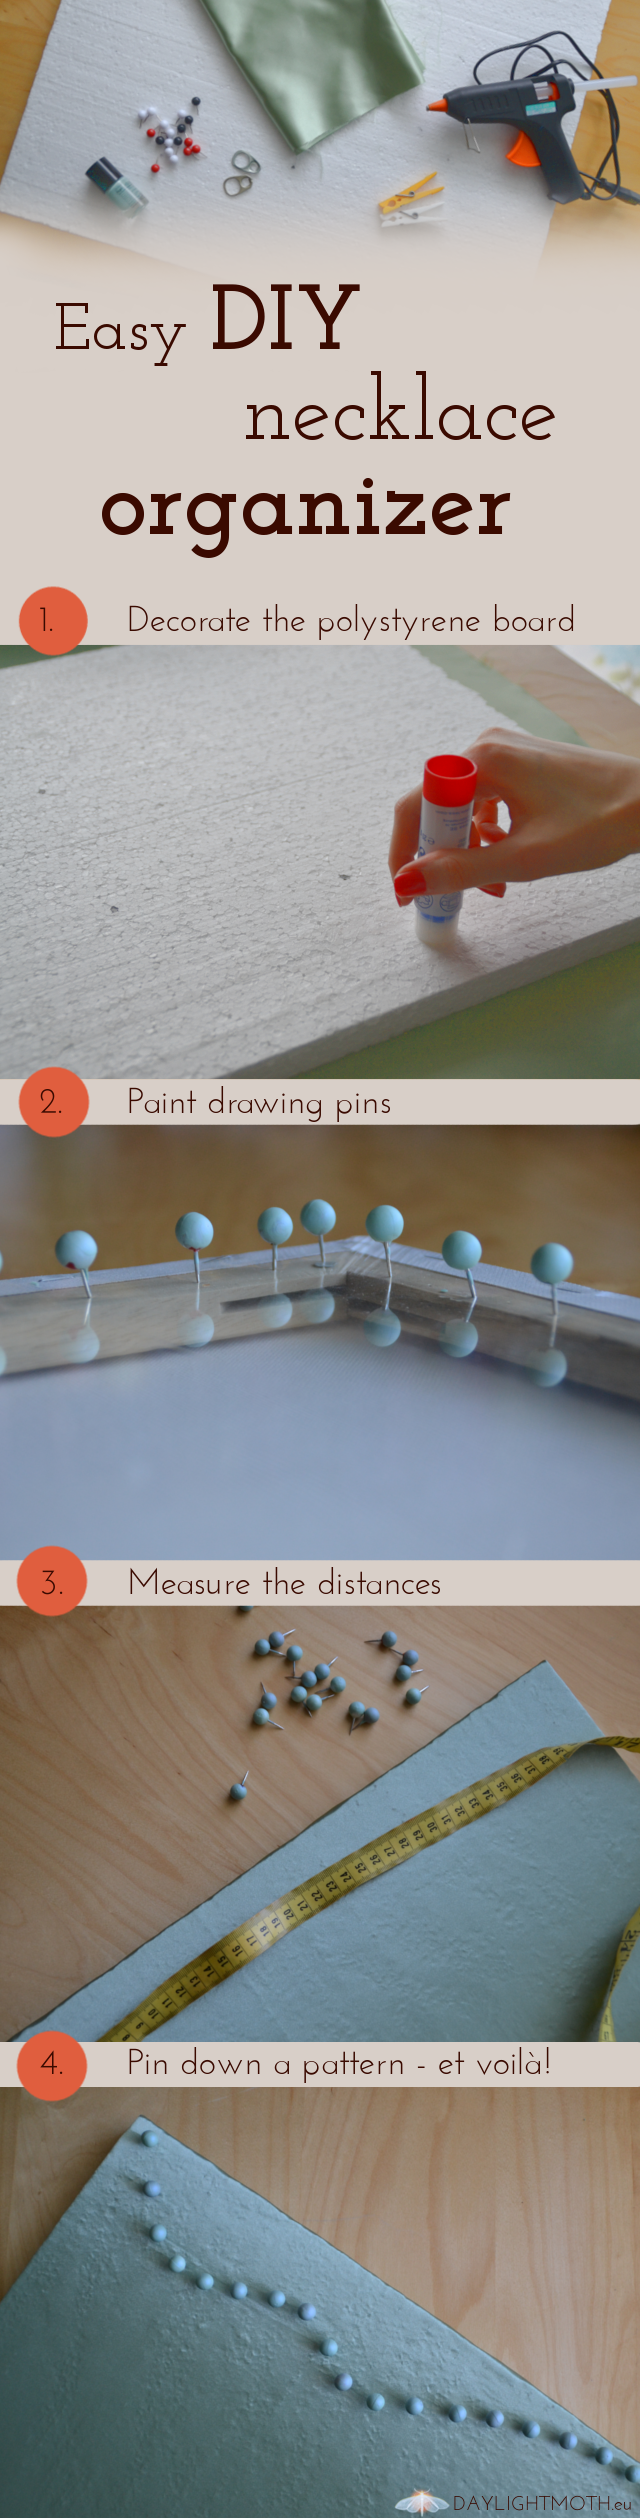 To decorate the pins I used some nail polish I already had at home. This works very well because you don’t need much and you have a wide variety of colours. Then you can start putting the pins on your board – no rocket science required, only some basic math skills to define the space between the pins on the board. To create a look that was a bit more interesting I drew a curved line with a chalk pencil and pinned along this line.
If you want to hang this on the wall you can fasten some hangers on the back (or use some can opening handles).
How it worked out for me
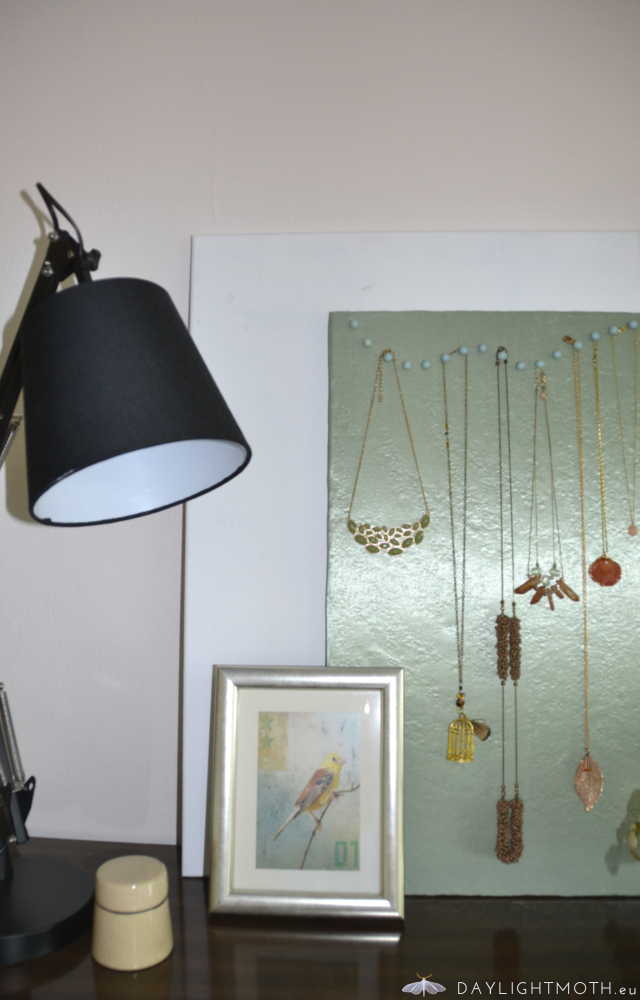
I like that the structure of the polystyrene board is visible through the fabric giving it an almost stone like structured look. I do like my necklaces displayed and hanging side by side. But if you’re owning heavy necklaces you might want to go for something sturdier as a base, maybe cork or even soft wood.
I have to say that these displays look best when they are not loaded with jewellery but leave some breathing space in between. So… decluttering might be a good idea before this project.
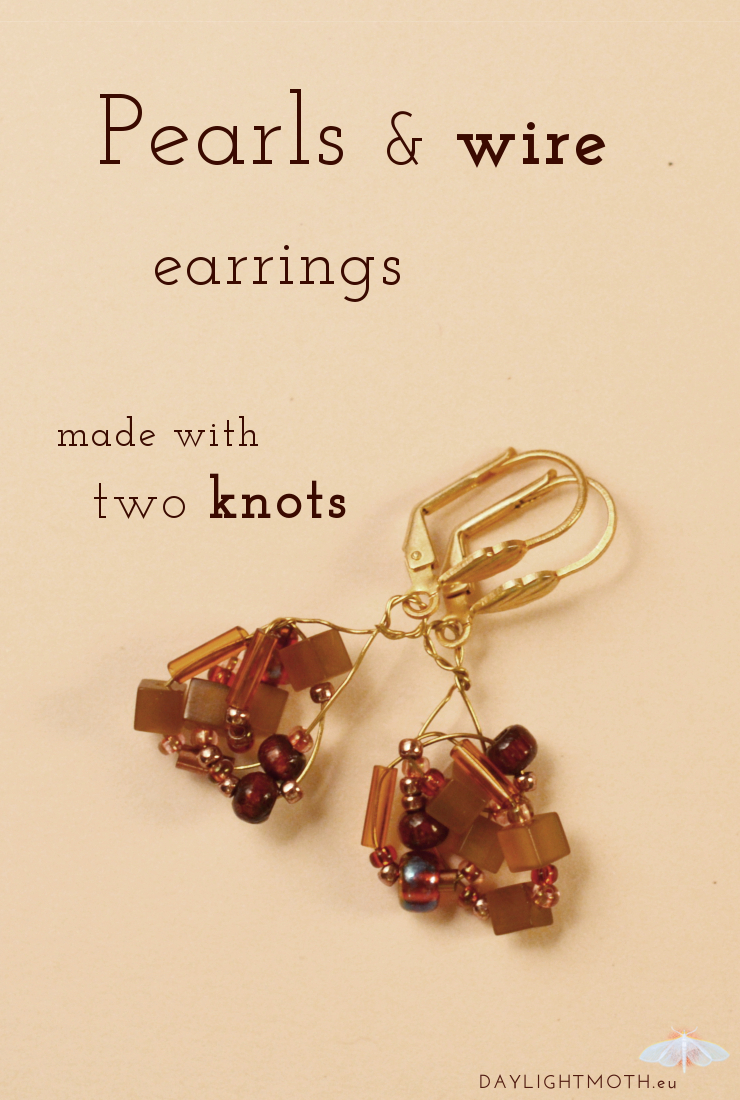
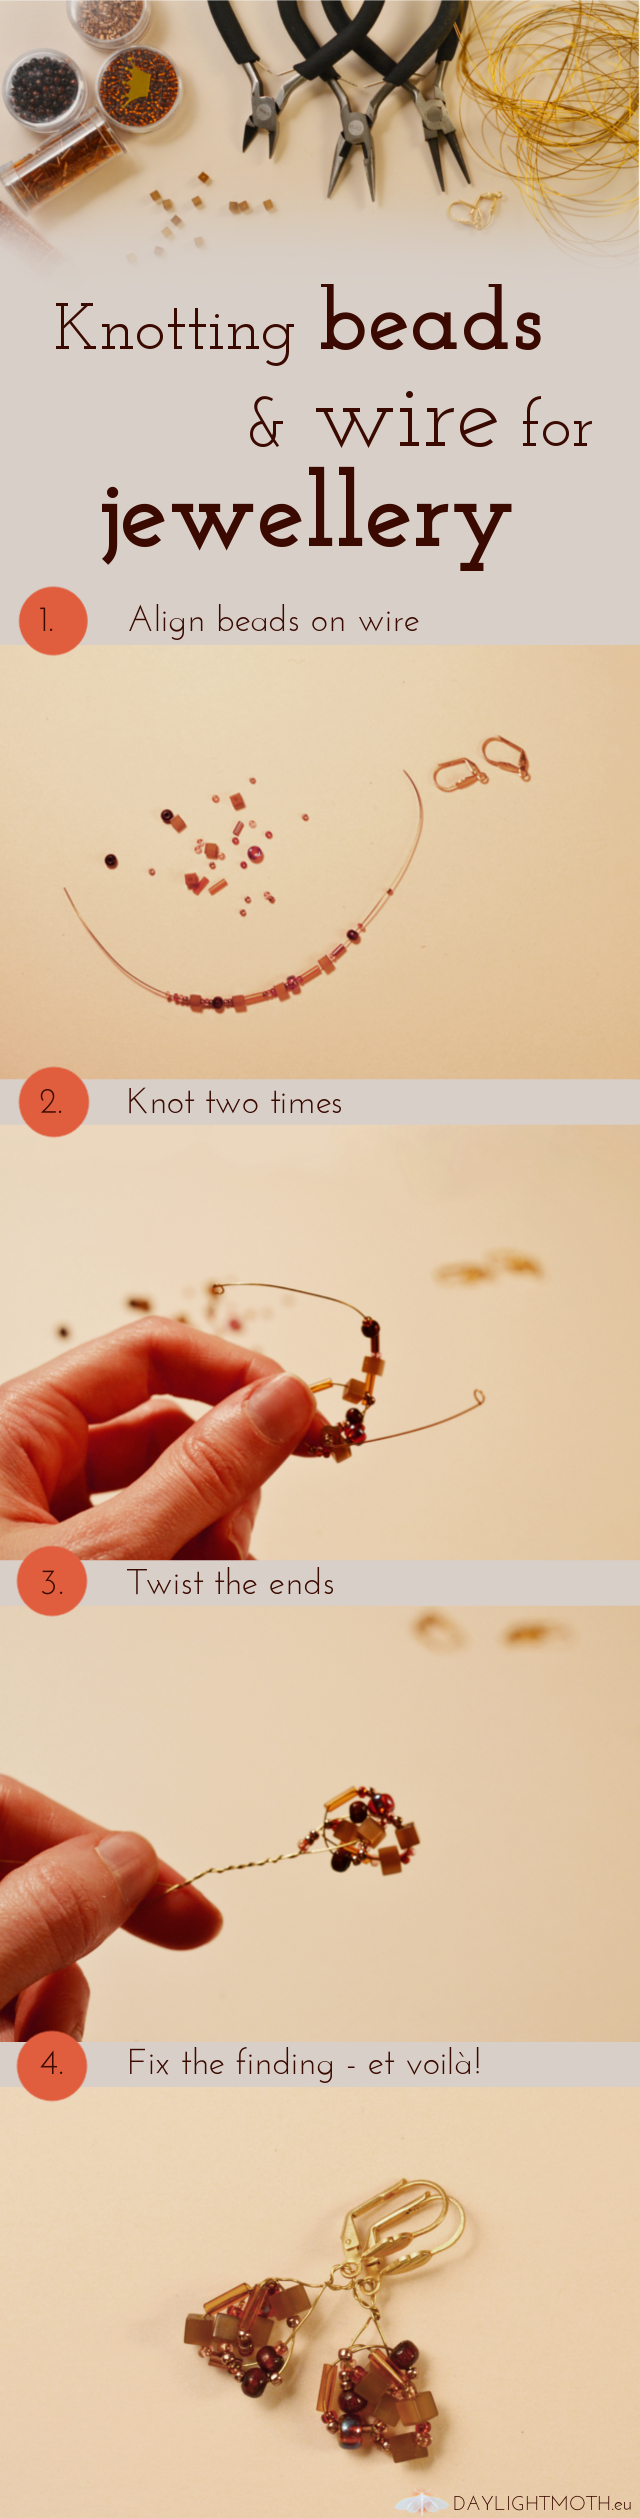
 In this post I want to share a way of combining different beads strung on wire and knotting them together to create jewellery. This is a great method if you want to use smaller beads. I especially like it as I can choose and combine colours or shapes as I like and create different effects. Also, it’s not very complicated or time consuming.