Author Archives: Sophie

My year of 12 Challenges – and what I learned from it

Are you a big fan of New Year’s resolutions? Yes, me too. But last year I wanted to try something different. I set myself up for one challenge each month – went on a facebook diet, tried zero-waste living and wore different shoes each day for a month. Here’s what I did and how it changed my life.Are you a big fan of New Year’s resolutions? Yes, me too. But last year I wanted to try something different. I set myself up for one challenge each month – went on a facebook diet, tried zero-waste living and wore different shoes each day for a month. Here’s what I did and how it changed my life.

January – Try a new recipe each week

This was easily the most fun challenge of them all. I wanted to get more variety onto my dinner plate and eat more varied. In the end, I liked this challenge so much I kept it up throughout the whole year.

I’ve never cooked so much in my life and enjoyed doing so. And I’ve immensely broadened my recipe stock and tastes. I learned to love artichokes and olives (all the Italians laughing at me right now). I learned how to make home-made hummus and got in the habit of making recipes from scratch. Also, I’ve never eaten healthier in my life.

So… This was a win! If you feel only the littlest bit inspired to try it too, do it!

February – No social media during your commute

Gasp! Yes, I did it, I said no to facebook and yes to more books. When I was younger I diligently read books during my commute but somehow lost it to scrolling through facebook on the go. This had to change. And I did it.

It wasn’t even hard to do without the social media. I just had to watch myself not to automatically grab my phone as soon as I got on the train.

Should you try it? Definitely! Try to see if you need your social media as much as it needs you and you might be surprised.

March – Go zero-waste

This was hard. Did I manage? No. For example, I bought a sewing machine and boom: box full of plastic wrap and polystyrene. But that was not the only plastic I bought (just to clear things up: zero-waste means zero-plastic and zero-cans to me). Sometimes, it’s pretty hard to get fresh spinach that’s not in a plastic bag and it’s even harder with rice or nuts.

I did however go to a “buy it in bulk” store once. Today, I buy all my other fruits and vegetables mostly unwrapped and I changed my toothpaste and toothbrush to zero-waste.

Was it worth it? Yes, but I can only do baby-steps.

April – Walk to work (well, the last mile)

Instead of taking the subway for my last part of the commute, I decided to walk (takes about 17 minutes). Did I manage? No, I did not. Because: Sometimes I was late, or it was raining, or I was not wearing the right kind of shoes… I did however re-take the challenge in June and already got much better. Then near the end of the year, I found out that I best do my morning walk as a separate event, not as part of my commute. I want to get up earlier and go for a walk in the woods.

May – No shopping fashion

I’m a big fashionista and I love shopping. It’s not like I’m constantly buying a ton of new clothes – it’s more that I’m steadily buying a few very expensive clothes. So, I wanted to see if I can stop it for at least one month. And I could! Yay, I win! Today, it’s so much easier for me to only buy clothes once in a while. The challenge definitely helped me to feel the need to constantly want more clothes.

June – Wear different shoes each day

If you are not a minimalist and you like cute shoes (Who doesn’t?), chances are, you might own a lot of shoes but wear only a few of them. I vowed to change that and wear a different pair of shoes each day.

This can be very enlightening: For example, you could wear a pair of shoes you always thought were very uncomfortable – and then find out that they are only moderately uncomfortable and wear then a lot more often.

You have more than 30 pairs of shoes? Try it!

July – Travel some place unknown alone

In July, I wanted to go on an adventurous trip somewhere unknown. I ended up visiting Budapest (without speaking one word Hungarian) and it was lovely and very hot and eye-opening. Want to know more? Here’s how I travelled to Budapest all on my own.

August – No sugar

That sounds daunting, right? And it was! But I did very well and had only one cheat day (My mother baked a cake. Of course, I said yes to the cake!). It was both harder and easier than I thought. Easier because I was already eating quite healthily and the shift was not earth shattering for me. Also, after some time, I was surprised that I did not miss sugar as much as I anticipated. On the other hand, I had some serious “I want chocolate now” moments and it was hard to not get it.

In the end, this was so much more manageable than I thought. It’s enlightening how easily you can adjust to no or only very little sugar. Also, it really changed my perception of taste.

Was it worth it? So much!

September – Meditate each morning

Almost did that. (I did not finish September but already started in August and managed an amazing 42 days streak) To be honest, it did not do great wonders for me – but that might be because I am a lucky person to be naturally calm and contemplative. Already got the Buddhist brain 😉 Or maybe I did not do it right? Or maybe, I need something different?

Was it worth it? Yes, because sometimes you just have to try some things to see if they work for you or not.

October – There’s an app for that

Near the end of the year, I got a little tired of the constant challenge-mode and it was harder for me to come up with new things. Then I found an app that suggests all kinds of things for you. It wanted me to do five push-ups or whistle a song (which I cannot) or suggests you go hiking up a mountain. So, that’s what I did. I asked my mother (much more experienced with all things outdoor than me) and on November 1st, we went up a mountain. Lucky me, living near the Alps, it was quite easy to get there.

I really loved this experience and I started to go on more hikes – even though it was winter. This year, I’m even planning a hiking vacation in the Alps and next year I want to cross them.

It’s kind of magical to try something you never thought of doing before. Who knows, you might end up loving it!

November – Have all my Christmas presents ready

Ha ha, nope…

December – No shopping again

Initially, I wanted to plan a dinner party for my friends. Then I realized that my apartment was in no way ready for that. So I changed it. I’ll save the dinner party for next year! I did hover add a second no-shopping challenge (except for Christmas presents), which was especially hard because I could not participate in Black Friday or all kind of sales.

On the other hand, this was very relaxing. Instead I spent lots of time planning for the new year and creating my 2018 goals.

I can totally recommend this: Make December the month of contemplation, not shopping and your new year will be so much better. J


So, what did I learn?

My year of challenges was a great year! I learned so much about myself: I learned that I can cook all the meals I want to cook, that I don’t really need facebook. (I didn’t regulate my facebook consumption after my challenge but a few months later, I just stopped using it without even trying. Saves me a lot of time.) I learned that there’s so much in my life I can stop or cut out.

It’s funny how so many things seem necessary or “part of yourself” or your life but if you question them you might find out that you don’t really need them. Or you might find out that some good habits that other people suggest are not really for you. On the other hand, you might embrace new things you never thought would fit you. Or you might discover that yes, you can totally cook even if your older brother always said you couldn’t.

It’s a great journey to discover more about yourself, test your strength of mind and have lots of fun while doing it.

Posted in Motivation | Tagged , , | Leave a comment

Travelling alone – Exploring Budapest

Budapest had been on my wish list for quite some time now (with many other places). Here's my blog post about exploring the city on my own.I’m not one of those people who’ve travelled half the world with just a backpack on their shoulders by the age of 22. I’m a shy introvert with a very bad sense of direction, picky eating habits and not very much into adventurous affairs. Still, I want to see more of the world and I decided I’ll do it on my own terms – starting slow with familiar territories and working my way up to more exotic places step by step. I also decided to do it mostly alone. Going somewhere unknown alone seemed scary to me at first, but it actually was not that bad – and it definitely has its benefits.

Budapest had been on my wish list for quite some time now (with many other places). Here's my blog post about exploring the city on my own.

Budapest – my impressions

Budapest had been on my wish list for quite some time now (with many other places). In the end I chose it because it was cheaper than Edinburgh. J Budapest is a wonderful city for everyone who enjoys art nuveau architecture and old castles. At every corner, there are interesting and beautiful old buildings – sometimes they would really need some renovation work but I think that adds to the charm. It feels a little bit like a mix of Vienna and Rome because there’s the grand architecture but there’s also hot summer and the living with crumbly facades and streets.

This is a view of Budapest from Gellert mountain

In Budapest, you can find some nice parks where you can stay during the midday hours, if you’re crazy enough to book a trip to Budapest in July. (You might consider going when it’s not that hot…)

The city is not crazy big so you can still get to lots of places by foot but the public transport system works really well. I have to say that I only got lost once (because: Google maps…) and overall was surprised at how well I could navigate there. I had a little trouble with the money and relying heavily on a currency calculator. Then again, everything was cheaper than in Germany – especially eating – so it was ok.

Budapest had been on my wish list for quite some time now (with many other places). Here's my blog post about exploring the city on my own. On my first day, I just went to the city walking around and exploring Budapest by foot.

On my first day, I just went to the city walkig around and exploring Budapest by foot.

Choosing my own agenda

I only went for five days but it was great. I visited nearly every art exhibition and discovered the photographs of Elliott Erwitt. Google him, he’s a wonderful photographer and a funny soul. I would definitely recommend visiting the National Gallery. And I had a great time at the Hopp Ferenz Museum for Asiatic Art. It is very small but I enjoyed it very much because it was kind of a re-visiting the East Asian culture (I studied Chinese and Japanese in university). I did not however visit Buda Castle or the Parliament and I did not even come close to St. Stephen’s Basilica (or any other church).

That was the wonderful thing about travelling alone: I could choose exactly what I wanted to do that day, what I chose to see or not see, when and where I wanted to eat and what time I wanted to get up.

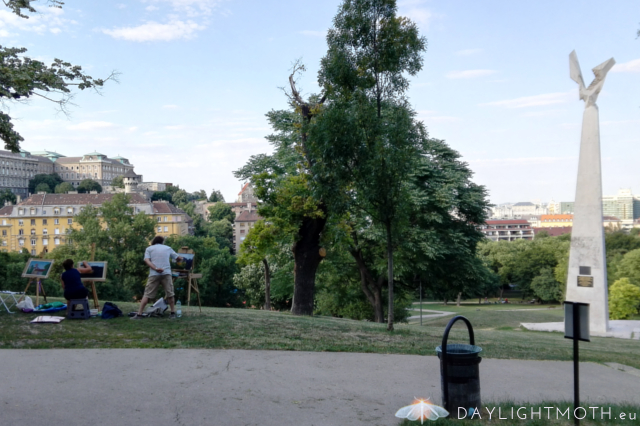
I climbed up Gellert mountain on my second day. It was quite steep and longer than I thought (should have chosen the other side) but on my way up I came across a group of painters in a park.

I climbed up Gellert mountain on my second day. It was quite steep and longer than I thought (should have chosen the other side) but on my way up I came across a group of painters in a park.

Three things I will remember from Budapest

  • Steep crumply roads if you find yourself crawling up one of Budapest’s hills
  • Sitting on a bench on Margaret Island and watching the Danube
  • Walking through the city streets in the shade of big trees and looking at the old facades

Three things I learned about myself

  • I really, really need a good and healthy breakfast in the morning – at 7:30 latest
  • I’m so used to my sugar reduced organic diet I had totally forgotten that most “normal” food you get will be with sugar and processed ingredients (Wow, reality check…)
  • I love art and I want to paint more

Breakfast in Budapest

I was a lucky girl and got this luxurious breakfast at my guest house.

Posted in Motivation | Tagged | Leave a comment

DIY Necklace Organizer

This easy peasy to make DIY necklace organizer was made mostly from leftover material and stuff I already owned, so it came quite cheap to me. And I like that the display invites me to wear my jewellery more.This easy peasy to make DIY necklace organizer was made mostly from leftover material and stuff I already owned, so it came quite cheap to me. And I like that the display invites me to wear my jewellery more.
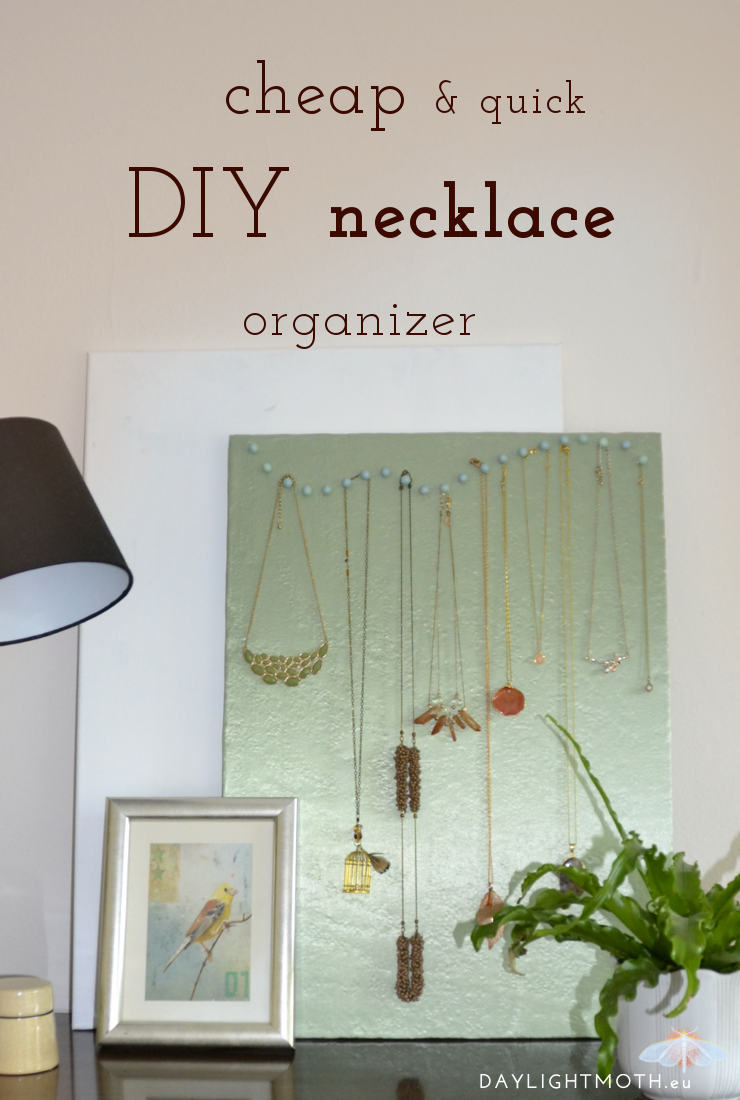
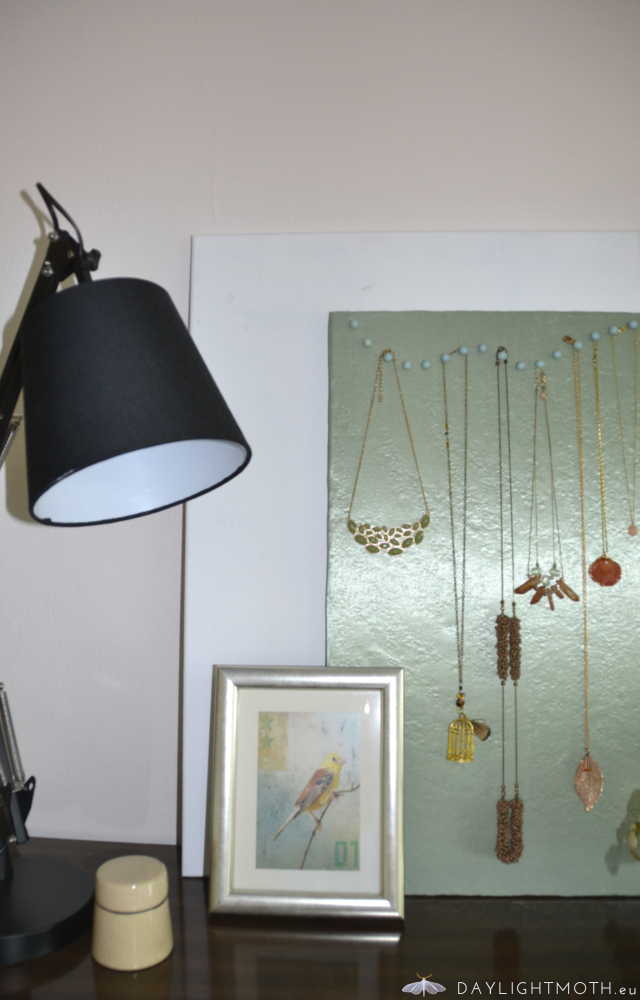
This easy peasy to make DIY necklace organizer was made mostly from leftover material and stuff I already owned, so it came quite cheap to me. And I like that the display invites me to wear my jewellery more.

I’m one of those girls who own lots of jewellery in all shapes and colours and sizes – and consequently always having a hard time to store all my treasures. I found a nice way of storing all my earrings, rings, bracelets and pearl necklaces in drawers but my longer and thinner pendant necklaces would constantly get tangled in these. So there had to be another solution for them – cue the DIY idea.


What you need

  • Polystyrene board (size depending on your longest necklace and how many you want to store)
  • Fabric to wrap your board in
  • Drawing pins
  • Nail polish or other varnish
  • Glue
  • About half an hour of time on two days


How to make the DIY necklace organizer

What I did is – simply put – making the ingredients look pretty and then putting them together. At first, I wrapped the polystyrene board with fabric. I was using normal paper glue for the front of the board to not make the glue sip through the fabric. To fasten the fabric around the edges I used a stronger glue. My glue gun worked nicely with this.

How to make an easy peasy DIY nicklace organizer from things you might already have at home (at least, if you are a crafter)To decorate the pins I used some nail polish I already had at home. This works very well because you don’t need much and you have a wide variety of colours. Then you can start putting the pins on your board – no rocket science required, only some basic math skills to define the space between the pins on the board. To create a look that was a bit more interesting I drew a curved line with a chalk pencil and pinned along this line.

If you want to hang this on the wall you can fasten some hangers on the back (or use some can opening handles).


How it worked out for me

This easy peasy to make DIY necklace organizer was made mostly from leftover material and stuff I already owned, so it came quite cheap to me. And I like that the display invites me to wear my jewellery more.

I like that the structure of the polystyrene board is visible through the fabric giving it an almost stone like structured look. I do like my necklaces displayed and hanging side by side. But if you’re owning heavy necklaces you might want to go for something sturdier as a base, maybe cork or even soft wood.

I have to say that these displays look best when they are not loaded with jewellery but leave some breathing space in between. So… decluttering might be a good idea before this project.

Posted in Crafts | Tagged , | Leave a comment

60 Days of getting up at 6:20 a.m. or: What it takes to form a habit

This is post no. 3 in my series of how to get up for night-owls. So far I’ve written about what science suggests to wake up more easily and I shared some tips on how to get out of bed even when you don’t feel like it. But merely knowing what you should do does not magically make you get up every day. It’s the habit that does the trick.
I knew that to really rewire myself to become an early riser I had to establish the habit of getting up every day at the same time – even on weekends. I had heard that it takes 28 days to form a habit but I already knew that other numbers were floating around, too. So, I doubled up the number to 60 (generously added some for the nicer look) and tried to see how I would progress with my habit building endeavour: getting up at 6:20 a.m. for the sixty days – everyday – even on days off. Let me tell you how it went:

You can skip right to:


Preparations to make

In the past I had tried several times to set a stricter rhythm but it never lasted more than three to five days. This time I wanted to make sure that I stayed consistent for far longer. I wanted the experiment to set my sleep and wake pattern not only for the next 60 days but for the rest of my life. That’s why I wanted to thoroughly think it through.

What made the difference this time?

1. Know why

When I started I was very clear about why I wanted to get up early every day. I had the strong wish to make my life better by solving the ever-constant wake-up-struggle of my life. The decision was about me and my life – not because other people (my parents) wanted me to get up earlier. And I already had a clear idea about what I wanted to use my morning hours for. I wanted to meditate and I wanted to write. Both are very important things to me and make me happy. I’m looking forward to do them and that makes getting up easier.

For my morning routine I took my normal morning as a basis (breakfast from 7:00 to 7:30 a.m. getting ready from 7:30 to 8:00 a.m.) and allocated the time before that for writing (20 minutes) and meditation (10 minutes). Then I added another ten minutes for throwing on warm clothes, using the toilet and doing some morning stretches.

2. Include the evening

I knew I needed to also include my evenings. I wanted to give my body at least seven hours of sleep. So I set my bed time to 11:00 to 11:20 p.m. But what really made the difference was my alarm clock I set to 10:00 pm that reminded me to get ready for bed.

3. Find a method that works for you

How will you make sure you make your experiment as easy as possible? What methods or tools will help you achieve your goal? I changed my alarm clock music because I wanted it to be a new start. And I used an app that helps me with my morning and evening rituals. It’s called The Fabulous and it’s really great if you want to make big changes in your life. The app will help you to develop rituals and plan them on certain times of your day. You can also use it as an alarm clock but that didn’t work for me so well (technical reasons).

4. Make it a ritualistic pattern

My morning routine is a set-up of a few different things that I always do in the same order. I know this order by heart and I think that repeating the same habits every day make my mornings easier and more structured. But this does not mean that you have to stick to something forever. I changed it several times and adapted it to better fit my needs and wishes.


60 days of early rising – How did it go?

Days 1-7 – My euphoric start

I started on my holidays so I could try out my routine without stress. That’s when I realized that I needed to adjust my routine a little bit and add the extra ten minutes before meditation for all the small things like putting on socks. Also, I wanted to have my tea already when I was writing but I didn’t want to wait on the cold kitchen tiles for boiling water. So I got a thermos flask that I fill with boiling water in the evening. In the morning the water will be just the right temperature for green tea.

Other than that it went surprisingly well. I got up every morning at my set time without fail. Actually I was quite amazed at myself. I was very tired on the weekend mornings but it was better after my ritual. I have to say my app helped tremendously. It counted the days that I succeeded and it felt wonderful to add one day after the other to my chain.

What did not work as well was the going to bed. I missed my bed time twice because I met with friends and that wasn’t pretty. But I was still motivated enough to pull through.

Days 8-14 – First results and first struggles

The first days of struggle appeared around day 10. The enthusiasm of beginning a big project had faded but the first premonitions of a forming habit helped me get through. As soon as I had begun my morning ritual I felt the tiredness fade. Day 12 was the first day I was looking forward to going to bed. That was a real novelty.

My evening rituals went quite well, but I realized that I often didn’t quite know what to do after my alarm rang at 10:00 p.m. Originally I wanted to use that time for studying, reading, writing… before I had to wrap up for bed at 10:30. It was meant to be the time for “only this one thing” and then transition into the night. But now I discovered that being free to do whatever I wanted with this half an hour meant that I didn’t really know what to do and didn’t form a firm habit of it.

Days 15-21 – Go on

Day 15 was a win because I was meeting with friends in the evening and I still managed to leave early enough to go to bed on time. Day 20 was another win because it was the first day I woke five minutes before my alarm rang and I actually got up! This might seem uneventful to others but for me it was the first time in my life to get up when I didn’t yet need to and giving myself five extra minutes in the morning. (Well, it was mostly because I really needed to go to the toilet, but still, I count it.)

Everything ran so smoothly I hadn’t even realized that I had already completed one third of my challenge. Time went so fast! And it was so manageable! I had expected a motivation low or some kind of dry spell to come up pretty quickly but nothing of that sort had happened yet. I felt fine in the mornings – they felt more and more natural to me.

The evenings were harder. Those are the ones I might have to rework again but even those were quite good. Three weeks of getting up at 6:20 every day would have seemed like the biggest challenge ever when I started. But with every day I accomplished my goal and I completed my rituals it seemed more normal to me.

Only sometimes I had those irrational longings to stay up to read until 1: 00 a.m. or to just let go and let myself sleep however long I want. But maybe that’s normal.

Days 22-60 – Hello routine!

As days went by, that exceptional state of mind I was in for the first weeks left and my routines felt more and more natural. I didn’t even think of the challenge anymore and even forgot the 30 days landmark. Yet, I caught myself on Fridays thinking: “Finally weekend, I can sleep in tomorrow… Oh, no I can’t.” Which only shows that the urge to indulge in old patterns is hard to break. And I did miss some weekend mornings during later weeks. Especially at the end – which made me a little disgruntled.

Another thing that was hard throughout the challenge was the evening routine I just didn’t get right. I still had not found how to make the half hour of “doing things with words” a precious time and establishing it with the relentlessness I worked on my early mornings.


What I learned from my getting-up challenge

In hindsight this was one of the best things I ever did for myself. I made a huge step towards a healthier wake sleep cycle. I solved my problem of constantly sleeping in and got much more of my weekends.

The strangest thing was: discovering that there was time in the mornings – and that I could use that time. Early mornings had never belonged to me. They belonged to school or work or sleep on weekends. No I discovered that I could make these hours MY hours. And that is a wonderful discovery.

But did it really help to make me get up at 6:20 for the rest of my life? Sadly, no. To me it will probably always be hard work. Or maybe it will be hard work for the next five years. Who knows… I looked up scientifically proven answers to how many days it actually takes to form a habit. New research suggests something between two months and one and a half years. But it probably always depends on how hard you find your habit goal. I find mine very hard.

Still, this challenge was a great experience and I would not want to miss it in my life. I have not been able to keep the waking hour last year but I was able to get up easier in the morning and I got up about three to five hours earlier on my weekends. So… Win!

And I have not given up on my goal. Actually I started a second attempt 42 days ago and I’m on a good track. I’m confident that I will manage to make it much longer. This time, I’m going for a whole year!


Posted in Motivation | Tagged | Leave a comment

Pistachio green culottes

With spring approaching fast and bringing lovely weather I wanted to sew some beautiful pistachio green culottes. Buuut… then things got complicated. This sewing project is not only a lesson in patience but also a prove that formidable things can arise out of alleged mistakes. Creativity is far too wonderful to give up on messed-up sewing projects.Or: How to save sewing mess-ups without sinking into despair
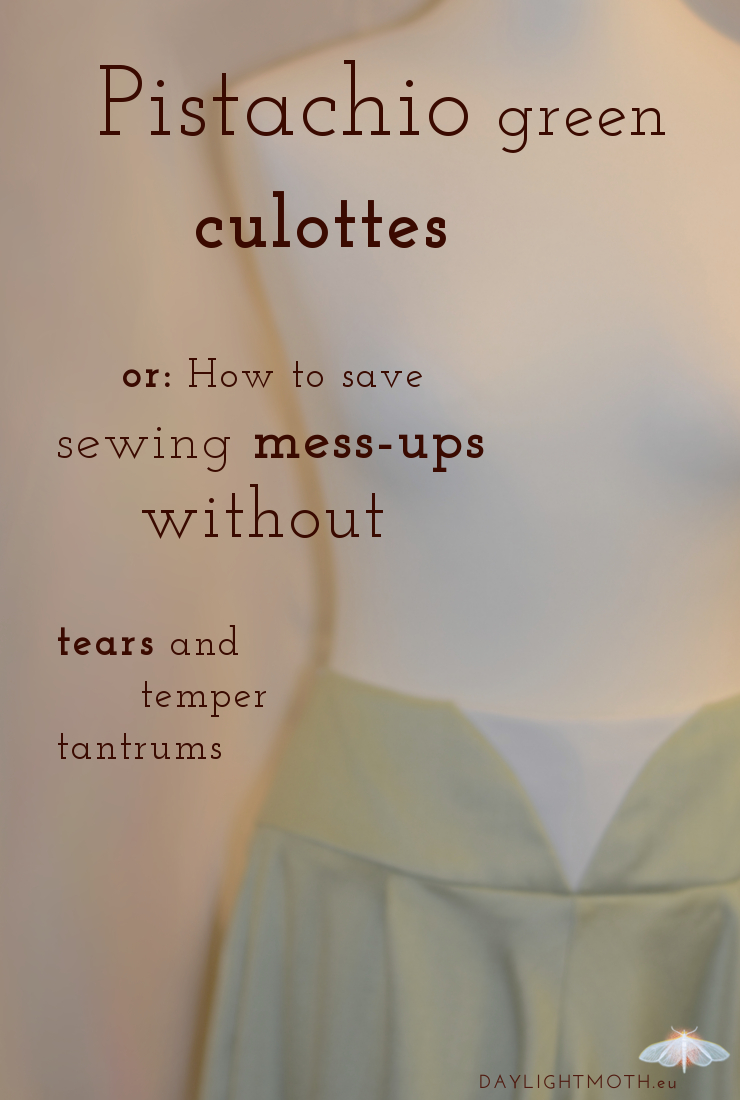
With spring approaching fast and bringing lovely weather I wanted to sew some beautiful pistachio green culottes. Buuut… I’m afraid it didn’t go so smooth with “just sewing a pair of culottes”. I never had this much trouble with any of my sewing projects in the past.

This was partly my fault because I suddenly failed at math and partly due to the fabric that turned out a lot more sensitive than expected. So this sewing project turned out to be a lesson in patience and perseverance more than anything else.

With spring approaching fast and bringing lovely weather I wanted to sew some beautiful pistachio green culottes. Buuut… then things got complicated. This sewing project is not only a lesson in patience but also a prove that formidable things can arise out of alleged mistakes. Creativity is far too wonderful to give up on messed-up sewing projects.

I found this beautiful fabric

I had bought the pistachio green fabric last year on my trip to Salzburg and I really love the fresh light green colour and the beautiful shine to it. I found it in the “designer fabric” department, so it was quite pricy, but I think it’s worth the money spent.

At first I thought I would like to make a pleated skirt. Then I chose the culottes because I love the style – midi length and wide leg – and it looks quite good on me. Also I decided that the culottes fit better with my figure and look more elegant and sophisticated. I wanted to wear them to work, so I opted for a little more seriousness.

Measure twice cut once – Oh, well…

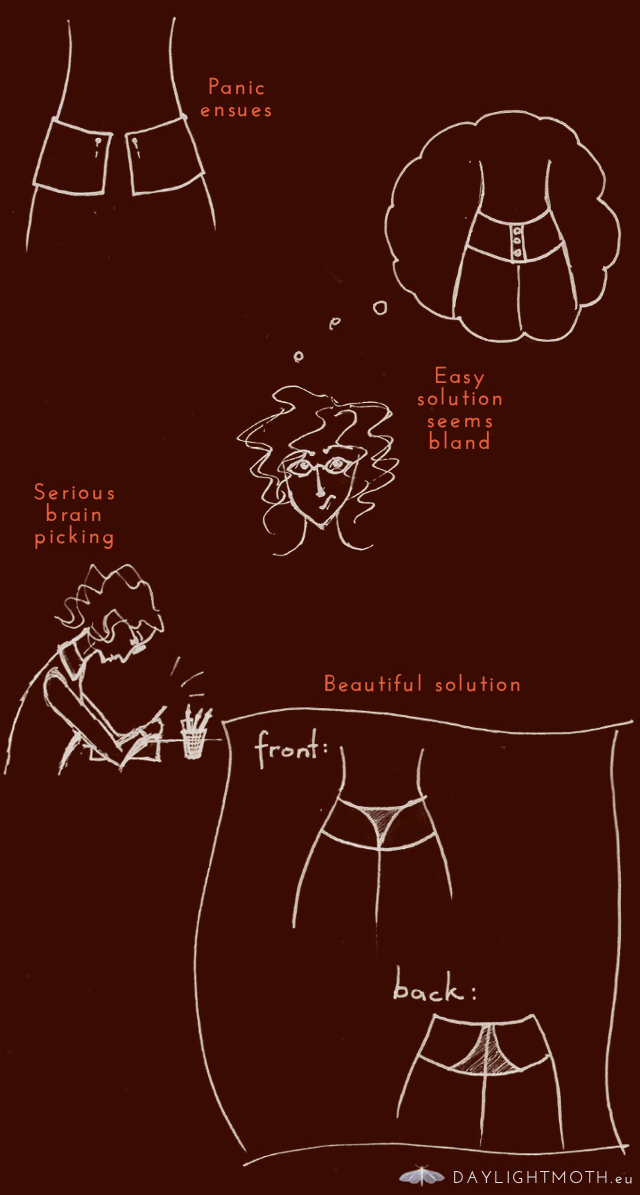
For the pattern I followed the directions from PETIT MAIN SAUVAGE. Not! Ok, I started with her directions as a base, then added a broad waistband and two pleats at each side. Then everything went a little wonky with the measurements and the math involved (really can’t tell how that happened). So I ended up with just one tiny pleat at each side.

I joined all the relevant pieces with their rightful partners until I came to begin with the waistband. I planned it to be about 10 centimetres broad fitting snugly around my waist. But when I tried it on I thought I had cut it too short. So I cut in in half to insert a button facing in the middle. But When I pinned it down I realized that it came out ugly.

So, that left me with two halves of too short binding and no fabric left to just cut the piece again… But I refused to give it up as ruined. I was determined that I would find a solution and I forced myself to sit down and think of something. And then I really came up with a splendid idea.

007 Pistachio green culottes Doodle

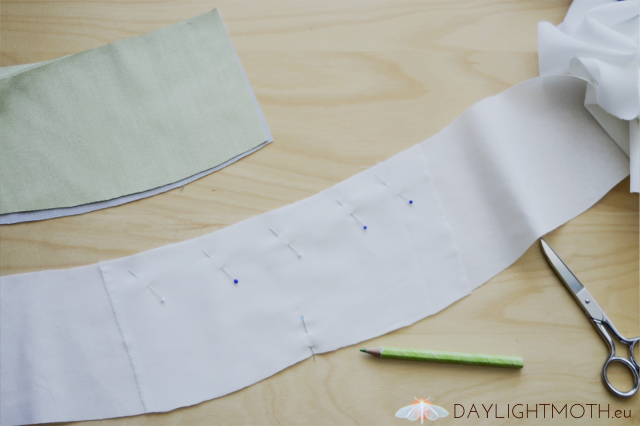
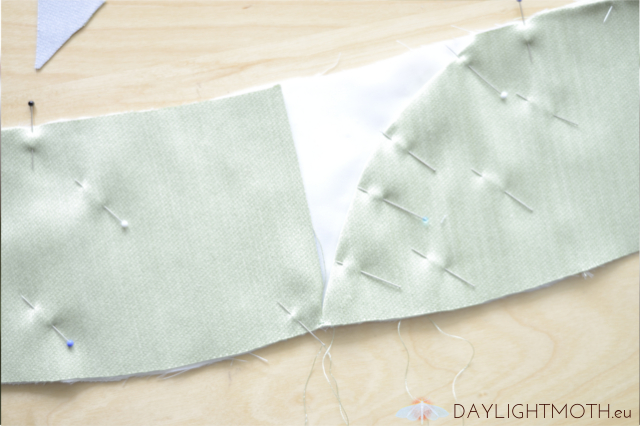
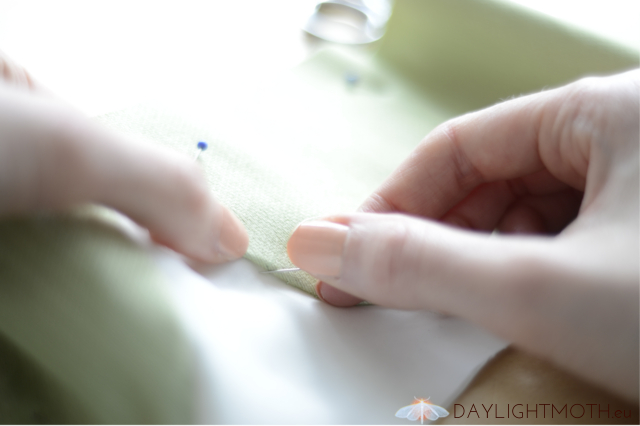
I added a contrast fabric in the front and back to add more length and I would connect these pieces in a round and decorative seam. This involved sewing per hand and consecutively a lot more work but it also made this piece unique and something special.

007 Pistachio green culottes Sewing 1

007 Pistachio green culottes Sewing 2

007 Pistachio green culottes Sewing 3

Little tip on the go: If your fabric frays worse than anything else, you might want to iron an inlay onto the back of it for more stability. I had to redo one of my seams because it had frayed.

I don’t make stupid mistakes – I make interesting experiments

So, just one more thing to add for this episode: In the end I realized that the seams had not been too short all along. I just must have tried it on weirdly. Ha! So maybe it should be: Measure twice, cut once, panic never! But maybe I needed this detour to really get the best culottes I am capable of. I’m glad that wrong measurements and irrational behaviour left me with a unique piece of clothing.

So, what I learned from this sewing project: Never give up – even when you think you’ve done something incredibly stupid or irreparable.

It’s only over when you’ve finished. It’s your decision. Creativity is full of wonder and maybe it’ll show you a way that is not what you wanted or expected but even better. Formidable things can arise out of alleged mess-ups. There’s just one catch: It’ll probably be more work.

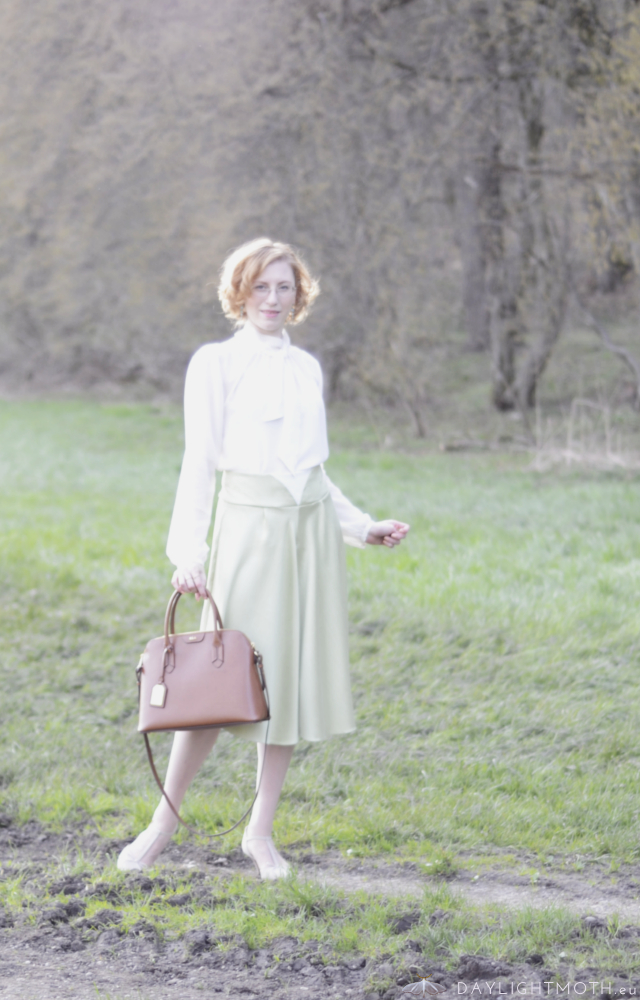
These are my finished pistachio green culottes - their sewing process was quite stressful but the finished piece is really wonderful.

Actually the culottes photographed here are not yet finished yet. Just as I finally had everything together my zipper broke and I had to unsew it. I will add a little follow-up with a close-up of the back as soon as the zipper is repaired.

Posted in Fashion | Tagged , , | Leave a comment

Pearls and wire earrings – made with two knots

In this post I want to share a way of combining different beads strung on wire and knotting them together to create jewellery. This is a great method if you want to use smaller beads. I especially like it as I can choose and combine colours or shapes as I like and create different effects. Also, it’s not very complicated or time consuming.In this post I want to share a way of combining different beads strung on wire and knotting them together to create jewellery. This is a great method if you want to use smaller beads. I especially like it as I can choose and combine colours or shapes as I like and create different effects. Also, it’s not very complicated or time consuming.
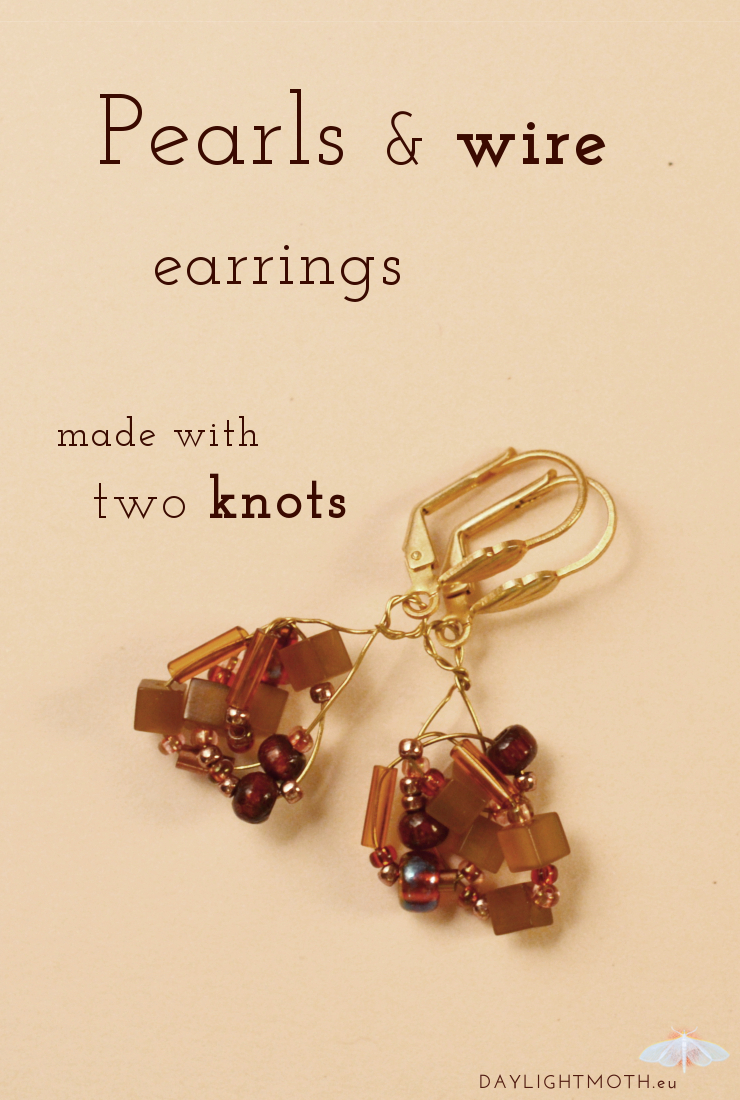
This post shows a way of combining different beads strung on wire and knotting them together to create jewellery. This is a great method if you want to use smaller beads. I especially like it as I can choose and combine colours or shapes as I like and create different effects. Also, it’s not very complicated or time consuming.

Step-by-step jewellery knots

1 Choose your colours

The most time consuming part for me is to select the batch of pearls I want to use in my project. I mostly stay with one colour and try to create depth with different tones. But two matching colours also look great. Sometimes I like to add small silver or golden pearls to add accents.

2 Get the pearls lined up

The next step is to cut a piece of wire (medium thickness) to bead the pearls. The wire should be considerably longer than your beads because you want to bend it, tie it and later have enough room to secure the whole thing with it.

Special tip: When all your pearls are on your wire, secure the ends so no pearls accidentally slip off when you twist and knot it. It’ll save you lots of nerves.

3 Make two knots

Start with the first one by bending the wire exactly in the middle and trying for a narrow knot. Your second knot can be looser. If you want to and still have enough wire and pearls left you can go for further knots. I try to knot my second one rather loosely because I find that this creates the most beautiful shapes and gives me the most control over the look I want to achieve.

Knotting wire with beads on it can be a little tricky and affords some patience and skilled fingers but it’s not that hard after your first try. And don’t forget: This is the most important part as your knots will define how your piece of jewellery will look in the end. You could tie a narrow or loose knot. You could make it a round ball, an oval shape or a flat drop shape.

4 Secure it

When you’re content with your shape secure the two ends by twisting them together. I like to use this twisted wire to form it into a ring for further use. Don’t twist too hard. This could destroy the shape you just made or break the wire.

5 Finish the piece

Now you can use your knot of pearls to finish a pair of earrings or a necklace. The knotted structure makes it quite robust (depending on the type of wire you chose) and up for almost any use.

This is a ste-by-step guide on how to make earrings from beads and wire. You only have to line up a batch of beads on wire and form two knots. Secure it and your DIY earrings are finished! #infogrphic #wirejewelry

Mix up the colours and shapes!

As you can see there’s no rocket science or witchcraft involved. It’s quite easy to do but still creates a complex effect. You could try it with your favourite colour. Or you could choose big round light coloured beads and combine them with small dark square ones. You could add in beads with special designs or shapes like flowers and leaves. You could choose a contrasting colour for your wire. Or you could do something completely different. I’m curious about what ideas you are coming up with! Definitely let me know in the comments!

Posted in Crafts | Tagged , , , | Leave a comment

What I did to make getting up better

How do you feel when you’re getting up in the morning? Are you energized and feeling ready for a great day? Or do you roll out of bed feeling grumpy and miserable and like you’re totally not up for anything? If getting out of your bed and starting your day is really hard for you and you’re looking for some tips to make your morning less dreadful - especially when you’re a night person - then this is for you.How do you feel when you’re getting up in the morning? Are you energized and feeling ready for a great day? Or do you roll out of bed feeling grumpy and miserable and like you’re totally not up for anything? If getting out of your bed and starting your day is really hard for you and you’re looking for some tips to make your morning less dreadful – especially when you’re a night person – then this is for you.
How do you feel when you’re getting up in the morning? Are you energized and feeling ready for a great day? Or do you roll out of bed feeling grumpy and miserable and like you’re totally not up for anything? If getting out of your bed and starting your day is really hard for you and you’re looking for some tips to make your morning less dreadful - especially when you’re a night person - then this is for you.

This is the second part of my “Getting up for night owls”-series. If you’re interested in part one, go here.

Part 2: Making mornings better

Getting out of bed was a struggle for me for a very long time. I was not able to get up when I should have – even though I used up to three different alarm clocks at one time. Still, I needed at least half an hour to roll out of bed. People just turning off their alarm clock and getting out of bed like it was nothing were a big mystery to me.

At one point I realized that when my alarm rang and I woke up, the first thing I thought was “Noooo…” I felt that this was awful – starting your day with a big no, rejecting it even though it’s a wonderful present given to me. I wanted to start my day with a “Yes”.

So, I tried to find out what would make my morning better and what would help me go from “Noooo…” to a more positive feeling. And of course I tried to find out what I could do to get out of bed on time.

1. Get rid of horrid alarm clocks

005 Aufstehen Doodle 1

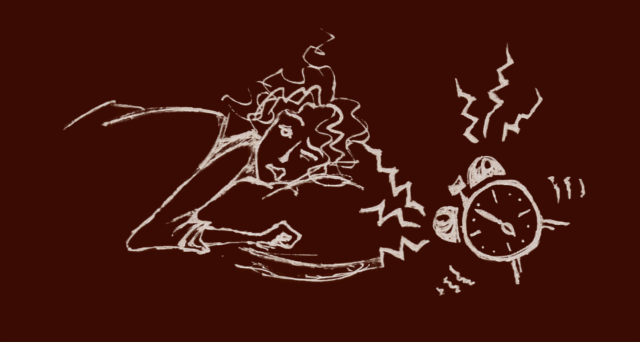
This is one of the first things I changed. Most alarm clocks make an awfully loud and disturbing sound. Of course being thrown out of sleep by obnoxious beeping does not make you happy. I found out that I’m very sensitive to noise in the morning. So I stopped using beeping and noisy alarm clocks.

I wanted to be woken by music. So I tried lots of different songs. For me, it has to be a song that is starting very slowly and is not too strenuous to listen to. Instrumentals are nice, or singers with soft voices.

But most of all I need a song I connect with a very positive and motivating feeling. I used the theme from Pride & Prejudice for a long time because this song gave me the feeling of a wonderful promising morning. So, don’t just take your favourite song (you might grow to not like it so much anymore when it’s your alarm sound), take the song that you connect with motivation.

2. Let in the lights

005 Aufstehen Doodle 2

Your body will recognize time to wake up when it’s lightening up outside. But I cannot sleep without my blackout curtains and I don’t have a high-tech home that will automatically open them in the morning.

So I decided to try a light alarm that simulates sunrise. Mine was quite expensive but it really works for me. I’m very smoothly woken up and I’m even awake before my music starts to play.

Although, this has not always been the case. I haven’t woken up from it in the beginning. For me it only works if I’m getting enough sleep. But still, this step has made waking up so much better for me.

3. Get warm

005 Aufstehen Doodle 3

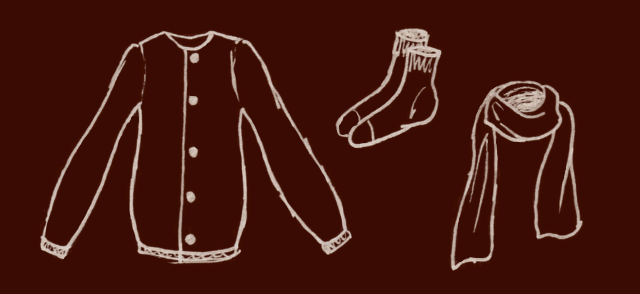
This might be something people living in moderate and colder climates know very well: It’s hard to get out of your bed because it’s just so nice and warm under your blanket while it’s frosty cold in your room. The solution to this is very easy: Just put a warm sweater and warm socks, your scarf or whatever else you need to get warm right next to your bed so you can access it from there. Or you can just wrap your blanket around you and get up with it. Who’s going to judge you?

4. Get something to drink

005 Aufstehen Doodle 4

This is probably something you might have heard in several other blogs and videos on morning routines. It’s suggested to drink water after getting up to get rehydrated after the night.

But getting something to drink first thing in the morning is not only healthy it also has the effect of creating a habit that tells your body that it’s time to get active. Sometimes I’m getting out of bed and feeling really tired but after my glass of water I instantly feel better. To me drinking a glass of water also has psychological value.

Water is not your thing? Try tea.

5. Move

005 Aufstehen Doodle 5

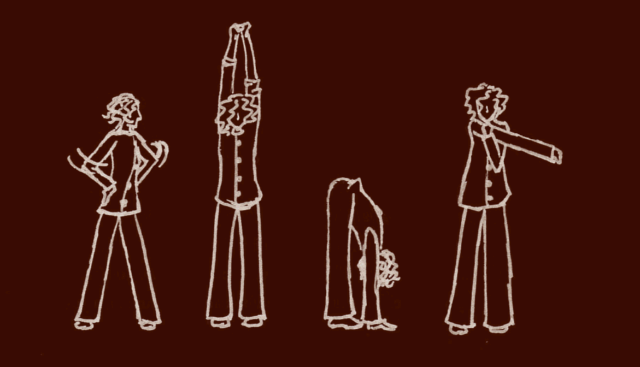
Moving your body will help you to liven up your blood circulation. But don’t fret, this does not mean a 20 minute boot camp work-out. I tried to make some heavier exercises but it just didn’t feel right for me. So now I’m only doing some yoga related stretches to wake up my back muscles. It takes about three minutes that’s it. Even three short minutes is enough.

6. Do something for yourself

005 Aufstehen Doodle 6

I tried this with ten minutes of meditation and writing in the morning. I got up earlier to have time to do something purely for myself that makes me happy. To know that there’s something that’s worthwhile waiting for me makes getting up easier for me.

But it also makes my whole day better. I can deal better with all the things I have to do in a day when I’ve already had half an hour to myself that was filled with things I wanted to do. It makes all the difference in a day.

5. Eat

005 Aufstehen Doodle 7

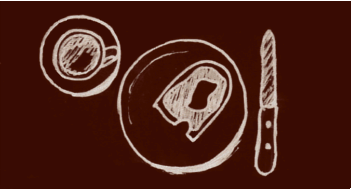
I feel far too many people are neglecting breakfast saying that they’re not hungry. This is something I just cannot understand because I’m really hungry in the morning and if I don’t get anything to eat I might get very cranky and then get dizzy. But really, all those health experts can’t be wrong when they’re telling you to get a good breakfast. Maybe you just have to try it out. Get a good breakfast and enjoy the extra energy!

Make it your morning – even if you’re a night-owl

Thinking back on what made my mornings awful in the past, there’s one other thing I need to address: the feeling that morning is not your time of the day – that it’s somehow wrong to be up so early. It’s this sublime “What am I doing up already? This is too early! I won’t even know what to do with all this unexpected time before noon!” (last statement only applies to days off)

This might even have a good reason, because your body is used to a late bed time and will want to pace itself to still have some energy left then. It’s even scientifically proven that night owls have more stamina throughout the day. We start slowly but perform better throughout long hours.

So maybe you must accept that mornings are not your most productive or energetic time of the day. But you could still feel good about them and make them “your” time. I think the secret to this is to do something that is important to you after getting up. If you are able to build a strong habit of filling your morning with worthwhile activities, your brain will understand that “morning” is a real time that can be used and leveraged. Remember our good friend Goethe when he said: “Only what we use is really ours.” So, use your morning, and make it yours!

Try it!

Those were my tips on good mornings acquired from personal experience and a fair amount of trial and error. Not everything I initially tried out worked well for me. And I changed the order of my habits several times. I suggest trying all sorts of good tips, but in the end, let your gut decide. If something does not feel right, don’t do it. It’s your morning. You decide. Make it wonderful!

In case you want to try it, this was my little step-by-step guide. You want to know more or you have a specific question? Just ask me in the comments.

Posted in Motivation | Tagged , | Leave a comment

Making a leafy circle skirt from an old dress

Do you know this problem? You have an old dress that is still very beautiful but is just not your style anymore? And you can’t get rid of it because it holds dear memories? I know this very well. This project is a transformation of an old frilly dress that held special memories but was just not my style anymore to a clean cut skirt I like better and will hopefully be up for new memories to make.Do you know this problem? You have an old dress that is still very beautiful but is just not your style anymore? And you can’t get rid of it because it holds dear memories? I know this very well. This project is a transformation of an old frilly dress that held special memories but was just not my style anymore to a clean cut circle skirt I like better and will hopefully be up for new memories to make.
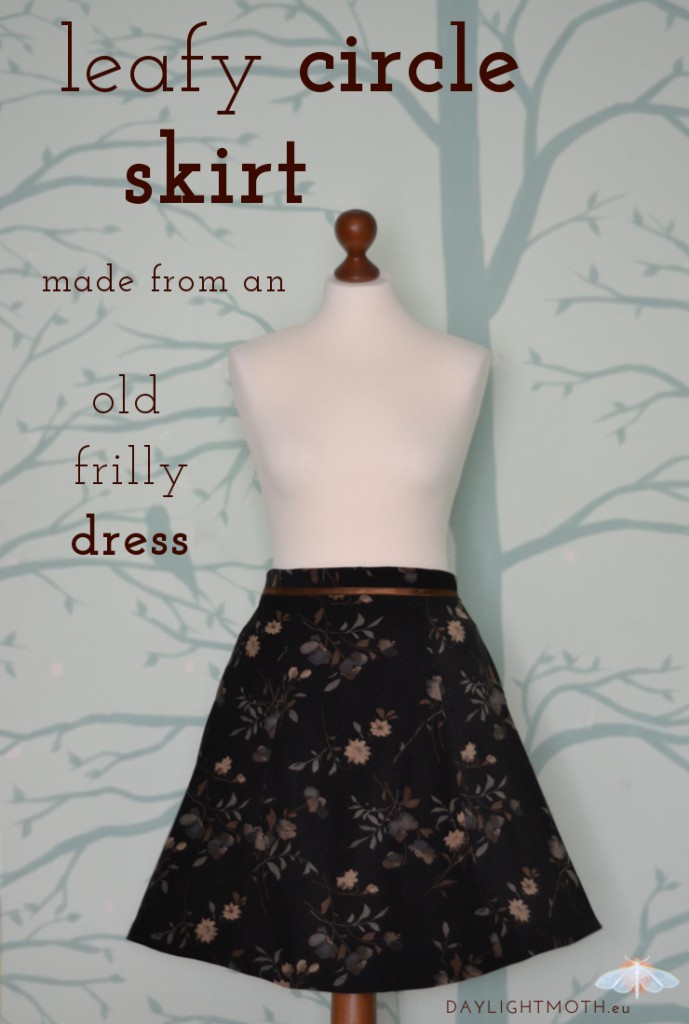
Also, in this post, I’ll be sharing my very secret smart girl trick on how to easily get a clean hem on a circle skirt.

Do you know this problem? You have an old dress that is still very beautiful but is just not your style anymore? And you can’t get rid of it because it holds dear memories? I know this very well. This project is a transformation of an old frilly dress that held special memories but was just not my style anymore to a clean cut skirt I like better and will hopefully be up for new memories to make.

Getting rid of emotional baggage and creating something new

It’s very hard for me to get rid of old clothing – especially if the garment has a special meaning to me. I had an old dress that I had sown for a trip to Hamburg. The trip was a gift from my parents for finishing school. I traveled there with a friend and although we didn’t have a lot of money to spend we had a great time viewing the city and the harbor, going for a walk in the city park and visiting lots of museums. To me this trip was like a goodbye to school and preparing for a new stage of life: university.

But now, about eight years later, my style has changed and the old frilly dress does just not fit anymore with what I currently like to wear. But I still like the leafy fabric. So I decided to transform the old dress into something new. I like to wear skirts better than wearing dresses because it gives me more freedom in combining my clothes. I also don’t like such a dark fabric so near to my face. (My style of dressing was radically different back then.) That’s why I decided to change the dress into a skirt. Since the fabric with the leaves is already very playful, I wanted to build a contrast with a clean and elegant cut – maintaining the circle shape but taking away all the frill.

Small changes to transform a frilly dress into a clean skirt

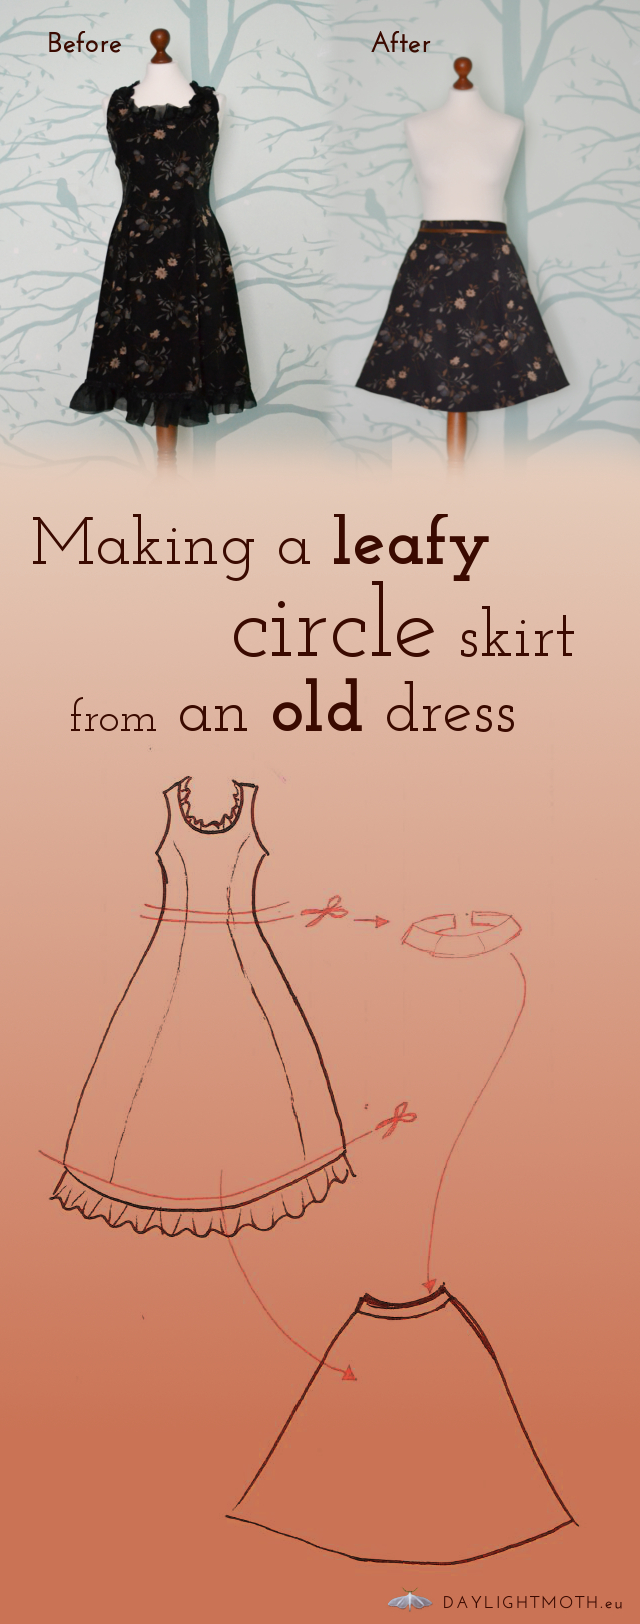
I made one cut at the waist. (You might want to rip out the zipper beforehand or else you might cut through the zipper like I did.) Then I took away the bottom border. This left me with the basic framework of the skirt. I took another strip from the waist to form a waistband. Of course, the seams on the skirt that remained from the dress didn’t really match with the seams at the waistband. To hide this fact I set a contrasting bias binding between those two parts. I reset the zipper and already – my skirt was finished!

This is a very easy and uncomplicated way of making a skirt from a dress. and creating a new piece of clothing from somthing old #upcycling

How to really easily hem a circle skirt

The whole skirt was done in only about two hours. The process was so fast because I used my special secret tip for nice and clean looking circle skirt hems. All you need is a bias binding. Here’s a short explanation of how to do it in an infographic:

In this #infografic I'll share my special secret tip for nice and clean looking circle skirt hems. All you need is a bias binding. Here’s a short explanation of how to do it: 1. Sew the bias binding onto the skirt – right side on right side. As you can see, I didn’t even pin it down. 2. Sew on the inside. This will be even easier if you iron your seam after step 1. Try to sew a straight line in even stitches as those will show on the outside of the skirt. You could iron it after this step, too, to achieve a clean looking finish. 3. Voilà – enjoy your clean, not wavy, not creased hem!

  1. Sew the bias binding onto the skirt – right side on right side. As you can see, I didn’t even pin it down.
  2. Sew on the inside. This will be even easier if you iron your seam after step 1. Try to sew a straight line in even stitches as those will show on the outside of the skirt.
  3. You could iron it after this step, too, to achieve a clean looking finish. Voilà – enjoy your clean, not wavy, not creased hem!

Making new memories

This is my finished altered circle skirt made from an old dress..

I’m really happy with this skirt. I’m happy I managed to give it a second life in my present wardrobe and I’m already looking forward to making new meaningful memories with it. How about you? Have you ever had an old piece you could not let go because of memories? Have you altered it? Would you like to?

Posted in Fashion | Tagged , | Leave a comment

DIY decorative endpapers with stamps

DIY decorative enpapers with stamps - When binding books I always place a decorative sheet of paper between my pages and my cover. When I started bookbinding, they were usually just plain sheets of coloured paper. Recently I discovered the beauty (and addictiveness) of stamps and decided to up my endpaper game by creating my own nice looking decorative endpapers. Of course you could also use this as your home-made very individual scrap book paper.When binding books I always place a decorative sheet of paper between my pages and my cover. When I started bookbinding, they were usually just plain sheets of coloured paper. Recently I discovered the beauty (and addictiveness) of stamps and decided to up my endpaper game by creating my own nice looking decorative endpapers. Of course you could also use this as your home-made very individual scrap book paper.
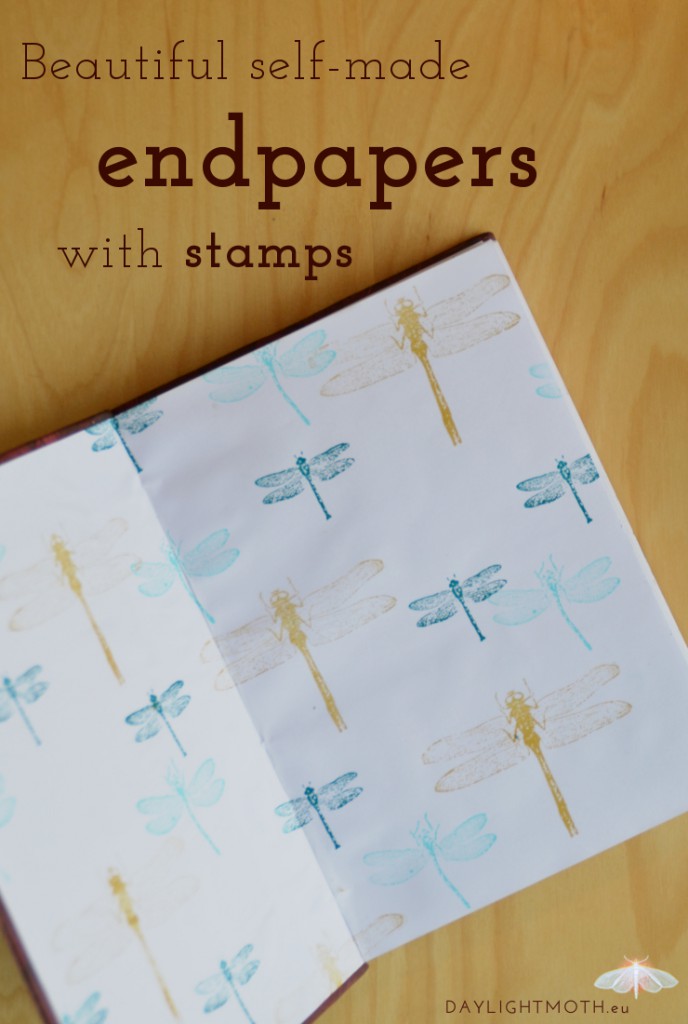
DIY decorative enpapers with stamps - When binding books I always place a decorative sheet of paper between my pages and my cover. When I started bookbinding, they were usually just plain sheets of coloured paper. Recently I discovered the beauty (and addictiveness) of stamps and decided to up my endpaper game by creating my own nice looking decorative endpapers. Of course you could also use this as your home-made very individual scrap book paper.

Three steps for prettily stamped papers

For this design I used three stamps of fireflies in different sizes. Mine came in a pack but I’m sure whatever motive you choose, you can find lots of different stamps in all shapes and sizes out there. The paper is very plain matte photo paper. I’ve bought that in a big bulk once. It’s a little sturdier than normal paper with a smooth surface. You can use all kinds of paper – coloured or white – as long as they’re a little sturdier than normal print-out paper, so preferably 100 g/m2 or more.

My stamp pads are a happy mix from various shopping trips and miraculously fit quite well together. I recommend three colours of either the same or similar tone in different levels of brightness. Or try using three completely different colours. Just makes sure those are all cool or all warm tones.

How to use colours and effects

1. Creating a base

I started with the biggest firefly in the lightest colour and then continuously went smaller with the design and darker with the colour. I didn’t want to overwhelm the whole pattern with the very big firefly, so that’s why it got the lightest colour and the scarcest use. The big motive is a good guideline for the whole design. It’s where you build your basic construction and what you’ll be working with in the end. All the smaller ones are just the extras on top. So, make sure, you’ve got an even but not too mathematical layout. And don’t overclutter. You still need room to breathe.

2. Play with it

Aligning all the stamps in the same direction makes for a calm and orderly look. But it might seem too severe in some arrangements. Just try to let a few of your stamps fall a little out of place. For my composition the slightly curved body of the middle firefly broke the geometrical pattern and added an interesting eye-catcher.

3. Add some texture

My first two colours were very similar in their lightness. To add depth to the picture I chose a colour that is several shades darker. This makes a rather bland composition interesting and vivid. I would just advise you not to choose black, as it might be too stark a contrast. (Then again, just go ahead and use black, I admit it, I just don’t like black)

Here's a little how-to for beautiful DIY endpapers with stamps. Of course you could use this as your self-made craft paper for cards, envelopes gift wrapping paper or all other kinds of ideas.

Creating other effects wit stamps

If you’re reversing the colours – big dark fireflies and small light toned ones – this will create a dimensional effect. Even more so if your lighter colours have a bluish tinge to them. Warmer colours appear nearer; cold tones appear farther away. But be careful not to drown your arrangement in too many big, dark objects in the front.

Pro-tips for a scattered looking arrangement

  • Let the motives overlaps. It’ll look instantly more natural and will loosen up your pattern.
  • Let some half fireflies fly into and out of the paper
  • The bigger the stamp, the less you should use it, especially if you’re going for a dimensional effect

As you can see, there’s really not that much to take into account. It’s an easy but effectual way to create a nice looking and unique paper. I use mine as an endpaper for my bookbinding projects but you could use it for whatever you like: cards, envelopes, book or notebook covers, covers for boxes, wrapping paper…

I really love my firefly ensemble and I’ve used it many times in different projects. So, just because I’m curious: What are your favourite stamp motives? Anything you could suggest to me? I would love to try something new.

Posted in Crafts | Tagged , , | Leave a comment

How to get up when you’re a night owl

Starting your day might be the most important thing. How you do it and how you feel when you do it sets the tone for your whole day. But how do you get up when you are naturally a night person and it’s just the hardest thing to you? Here is some advice on getting up from your residential night owl.Starting your day might be the most important thing. How you do it and how you feel when you do it sets the tone for your whole day. But how do you get up when you are naturally a night person and it’s just the hardest thing to you? Here is some advice on getting up from your residential night owl.
Starting your day might be the most important thing. How you do it and how you feel when you do it sets the tone for your whole day. But how do you get up when you are naturally a night person and it’s just the hardest thing to you? Here is some advice on getting up from your residential night owl.


My story on getting up

For as long as I can remember I went to bed very late – far later than my peers would – and I had trouble getting up in the morning. After 25 years of struggling with slept in alarm clocks, rushed mornings and half slept through weekends I decided to get a grip at my sleep-wake-rhythm. I wanted to make early rising a consistent habit. But I never really managed to maintain these ambitious goals for very long.

It was very hard for me to set a steady rhythm I could maintain throughout weekdays, weekends and holidays. Admittedly, I’m probably a very difficult case of night owl. I could be very happy rising at 5-6 p.m. and going to bed in the early morning, but that’s just not very socially compatible – and there’s something about starting your day with the first rays of light that nothing else can give me.

It’s the magic of starting your day on a silent soft morning with a whole day laid out for you. To me it feels a little bit like the first scene from the 2005 Pride & Prejudice film: Calm but full of anticipation for all the exciting things life has to offer. That’s what I wanted and why I kept trying even though I had failed so often.

After two years of trial and error and not giving up, I have finally established a steady routine of getting up and going to bed at the same times every day. So, this is my little series on getting up for all night owls who struggle with early rising just like I did (and sometimes still do). May it help. J

Part 1 – Getting up with a little help from science

To understand what getting up involves and why I was so bad at it I did some research about healthy sleeping patterns and morning rituals. This is a little synopsis of what I found most important.

1. Get enough sleep

It’s just that simple: If you want to get up early you have to go to bed early, too. Yes, I know you don’t want to. Yes, I know it feels unnatural. But if you don’t do it you will never feel refreshed in the morning. Maybe this is already the most important tip and you can just skip all the rest if you just go to bed in time. For me it certainly was important to understand and accept this fact.

Getting enough sleep is something you do for yourself. Be kind to your body – most importantly be fair. Continuously denying your body rest is asking for too much. Also, continuous sleep deprivation makes you look old and wrinkled earlier than you should. No one want’s that.

For me it is really hard to go to bed on time. I’m often very creative during the last hours of the day. It’s hard for me to stop myself from doing “just that one more thing” because I feel that I should have done it on that day. But how to end the day will be a topic for another post later in this series. (So, stay tuned!)

2. Same procedure as every day

002 Getting up for night owls Doodle 1

It helps to set the alarm to the same time every day – even on days off. At least that’s what science says. Humans are animals of habit, so it’s quite obvious that your body won’t like inconsistent sleeping patterns.

I was never able to pull off consistent rhythms although I’ve tried several times. Over the last two years I’ve become a little steadier and I’ve noticed that I’m now falling asleep a lot easier than before. So, there will be some success even if you’ve still got some way to go. It’s only now (since Januray 2016) that I managed to keep a nearly perfect rhythm.

So, don’t give up! Even when you might not manage it at your first try. I had to try about eight times. And every time I got better and kept the new habit for longer. And every time it was a little easier.

What I can already tell you is, that your body will already start to adjust to a certain rhythm within one week (ok, mine does, I don’t know about yours). To really form a habit however will take about two months. At least that’s what scientists say. Maybe it’ll take three and a half years. That’s what I say.

3. Cut the bad habits

Don’t snooze. Never. You will get used to not getting up when your alarm rings and it will make you feel bad. Hitting snooze is like starting your day with a lost battle. Don’t do that to yourself.

There’s still some debate in science whether snoozing is the devil or just annoying but actually not that big of a deal. It’s likely that your body will start a new sleeping cycle with every snooze session and you will feel even more tired when you’re woken the next time. But let the details be explained by one of my favourite YouTube shows: the phenomenal Mental Floss:

So, maybe it’s not even that bad for your sleep quality, but it’s definitely bad for your motivation. I practiced the snooze habit excessively when I was younger and it made waking up an awful ordeal on top of me constantly being late. Today I avoid snoozing and I can tell now that getting up with or without snoozing is equally as hard – but without snoozing is earlier, so that’s a plus.

Pro tip for those people who turn off the alarm and sleep on without even knowing what they’re doing because they cannot think straight when they’re woken: You clearly did not sleep enough. Go to bed earlier!

4. Know why you want to get up

002 Getting up for night owls Doodle 2

Why do you want to get up early? This might seem obvious, but try to describe it as clearly as possible. Write it down. Think about it.  Be honest. Today every blog post or YouTube video on productivity tells you to get up early. But this is about your very personal reason. Make it about you. Formulate a concrete goal – even if it’s a small one. A reason could be: I want to feel ahead of time. Or: I want to have a stress-free morning and enjoy a big cup of black tea on my sofa.

My goal is to rise early because I want to write in the morning while the sun rises. I want to start my day with half an hour to myself and a blank sheet of paper in my notebook.

I think you should start the day with something that you really like. Indulge yourself. It could be the one time of the day that belongs all to you. It could be your moment of silence and contemplation. It could be wonderful.

But it could also be a very mundane reason. I started with: I want to get up early enough to manage my morning routine and have time to walk to my train in fabulous high heels (instead of running in flat shoes).

Next time: How to face the struggle

So much for the theory. Next week I will share some of my practical tips that have made waking up better for me. Hope to see you there. Until then I’m really curious: Are you a night person or an early riser? And how have you managed your mornings so far?

Posted in Motivation | Tagged , | Leave a comment